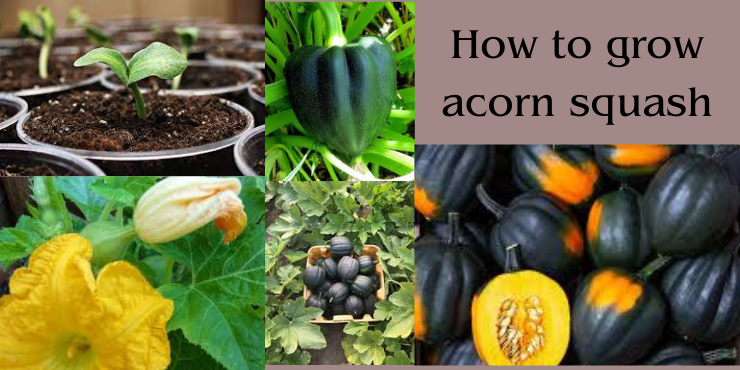
Acorn squash, with its sweet and nutty flavor, is a delightful addition to any garden and kitchen. If you’re eager to cultivate these tasty and nutritious vegetables in your backyard, you’ve come to the right place. In this article, we’ll provide you with a step-by-step guide on how to grow acorn squash successfully. From selecting the right location to harvesting your crop, we’ll cover everything you need to know to enjoy a bountiful harvest of this autumn favorite.
Choosing the Right Variety
When embarking on the journey of growing acorn squash, one of the most crucial decisions you’ll make is selecting the right variety. Acorn squash comes in various types, each with its unique characteristics, flavors, and growth requirements. Your choice of variety can significantly impact your gardening experience and the quality of the harvest.
Common options for acorn squash varieties include the classic dark green oak nut squash and newer hybrid varieties that offer diverse colors and flavors. Here’s a brief guide to help you make the best choice:
Classic Dark Green Acorn Squash: This is the traditional and widely recognized variety of acorn squashes. It features dark green skin with deep ridges and sweet, nutty flesh. It’s a great choice for those who enjoy the classic acorn squash flavor and appearance.
Colorful Hybrid Varieties: In recent years, hybrid Oak nut squash varieties have gained popularity for their vibrant colors and unique flavors. These can include orange, white, and even multi-colored squash. They often have a sweeter or nuttier taste compared to the classic green variety.
Miniature Varieties: If you have limited space or want individual-sized servings, consider miniature Oak nut squash varieties. They are perfect for smaller gardens and offer the same delightful taste in a compact package.
Early Maturing Varieties: Some Oak nut squash varieties mature faster than others, which can be advantageous in regions with shorter growing seasons. Check the maturity period of the variety to ensure it aligns with your climate.
Disease-Resistant Varieties: In areas prone to specific squash diseases, you might want to explore disease-resistant Oak nut squash varieties. These are bred to withstand common pests and infections.
Before making your selection, research the varieties that thrive in your specific climate and consider your taste preferences. Whether you opt for the classic or explore the world of colorful hybrids, choosing the right variety is the first step toward a successful and flavorful Oak nut squash garden. So, take your time to make an informed decision and set the stage for a rewarding growing experience.
Selecting the Perfect Location
Choosing the ideal location for your acorn squash garden is a critical decision that can significantly impact the success of your harvest. Acorn squash plants thrive under specific conditions, and the right location can make all the difference in nurturing healthy, productive vines. Here’s a guide to help you select the perfect spot:
- Sunlight: Acorn squash is a sun-loving plant, so prioritize a location that receives at least 6 to 8 hours of direct sunlight each day. This abundant sunlight encourages robust growth and ensures that your plants produce well-developed fruits.
- Well-Drained Soil: Opt for an area with well-drained soil. Oak nut squash dislikes standing water, so soil that retains moisture excessively can lead to root rot and other problems. Good drainage is crucial for the health of your plants.
- Protection from Wind: While sunlight is vital, acorn squash plants can be sensitive to strong winds that may damage their delicate vines. Consider planting them in a spot that provides some protection from gusty winds, such as near a fence or wall.
- Space: squash plants are known for their sprawling growth. Ensure you have adequate space for the vines to spread out. Typically, leave about 3 feet of space between each plant to accommodate their mature size.
- Accessibility: Think about accessibility for maintenance and harvesting. You’ll want to reach your plants easily for tasks like watering, weeding, and inspecting for pests and diseases.
- Soil Quality: Assess the quality of the soil in your chosen location. squash prefers slightly acidic to neutral soil with a pH level between 6.0 and 7.0. If needed, make amendments to improve soil fertility and texture.
- Microclimates: Be mindful of microclimates within your garden. Some areas may be warmer or cooler than others due to factors like nearby structures or water features. Understanding these microclimates can help you optimize your garden’s productivity.
By carefully considering these factors and selecting a location that meets the specific needs of squash plants, you’ll be well on your way to a successful harvest. Remember that a well-chosen spot sets the stage for healthy growth, robust vines, and a bountiful supply of delicious squash for your table.
Preparing the Soil
Preparing the soil is a crucial first step in the journey to successfully grow luscious acorn squash in your garden. squash plants demand specific soil conditions to thrive and produce an abundant harvest.
Begin by selecting a well-drained location in your garden that receives ample sunlight, as acorn squash loves basking in the sun. Once you’ve identified the spot, it’s time to enrich the soil. Incorporating organic matter, such as compost or well-rotted manure, is essential. This not only improves the soil’s fertility but also enhances its ability to retain moisture – a key factor for healthy acorn squash growth.
Keep in mind that acorn squash prefers slightly acidic to neutral soil with a pH level between 6.0 and 7.0. Testing your soil’s pH can help you make necessary adjustments with lime or sulfur.
By taking the time to prepare your soil properly, you’re setting the stage for robust acorn squash plants that will reward you with delicious, homegrown vegetables. So, roll up your sleeves and get ready to nurture your soil – it’s the foundation of a bountiful squash harvest.
Planting Acorn Squash Seeds

Planting squash seeds is the exciting beginning of your journey toward a bountiful harvest of this delicious and nutritious vegetable. Here, we’ll guide you through the essential steps to ensure your growing squash plants get off to a healthy start.
- Timing is Key: grow squash is a warm-season crop. To give your plants the best chance at success, wait until all danger of frost has passed before planting your seeds. The soil should have warmed up to around 60°F (15°C) or higher for optimal germination.
- Prepare the Soil: Before planting, make sure the soil is well-prepared. You should have selected a location with well-drained soil that’s rich in organic matter. Work the soil to a depth of about 12 inches and remove any debris or weeds.
- Planting Depth: grow squash seeds should be sown about 1 inch deep into the soil. Plant two to three seeds in each mound or hill you create. Mounds or hills help improve drainage and warm the soil faster.
- Spacing: Leave about 3 feet of space between each mound or hill to allow the sprawling vines to grow without crowding. This spacing promotes air circulation and prevents the spread of diseases.
- Watering: After planting the seeds, water the soil thoroughly to ensure good seed-to-soil contact and to initiate germination. Keep the soil consistently moist but not waterlogged throughout the growing season.
- Germination and Thinning: In about 7 to 14 days, you should see seedlings emerging from the soil. Once they have several leaves, thin them out, keeping the strongest and healthiest seedling in each mound. This ensures that the remaining plants have enough space to grow.
- Mulching: Consider applying a layer of organic mulch around the base of the seedlings. Mulch helps retain soil moisture, suppress weeds, and regulate soil temperature.
- Careful Observation: As your squash plants grow, keep a close eye on them. Watch for signs of pests or diseases and take prompt action if necessary to protect your plants.
By following these steps and providing your squash seeds with the right conditions for growth, you’ll be well on your way to nurturing strong and productive plants. With proper care and attention, your acorn squash will thrive, and you’ll soon be enjoying the rewards of your efforts with a bountiful harvest of these delicious vegetables.
Caring for Your Acorn Squash Plants
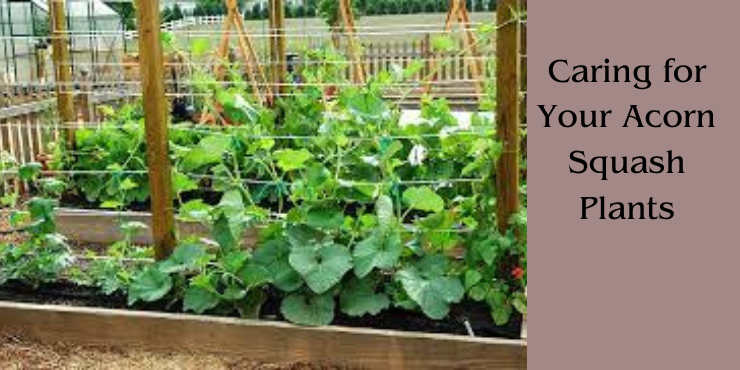
Caring for your acorn squash plants is the key to ensuring a healthy and productive garden. These robust vines, with their delectable fruits, require attention to detail and regular maintenance to thrive. Here’s a comprehensive guide on how to care for your acorn squash plants from seedlings to a bountiful harvest:
- Watering: Acorn squash plants thrive in consistently moist soil. Water deeply and regularly, especially during dry spells, to keep the soil evenly moist. It’s best to water the base of the plants early in the day to minimize the risk of fungal diseases.
- Fertilizing: To promote vigorous growth and fruit production, apply a balanced, slow-release fertilizer when the plants start to vine. Follow the manufacturer’s instructions for proper application rates.
- Mulching: Mulching around the base of your oak nut squash plants has several benefits. It helps retain soil moisture, suppresses weeds, and regulates soil temperature. Organic mulch, such as straw or compost, is an excellent choice.
- Pruning: Pruning can be beneficial to acorn squash plants. Remove any dead or diseased leaves or vines to improve air circulation and prevent the spread of diseases. Be gentle when pruning to avoid damaging healthy growth.
- Pest Control: Keep a watchful eye out for common pests like aphids and squash bugs. Early detection and intervention can prevent these pests from damaging your plants. Consider using natural repellents or insecticidal soap as needed.
- Disease Management: Acorn squash can be susceptible to diseases like powdery mildew. Use preventive measures like proper spacing, good air circulation, and avoiding overhead watering to reduce the risk of fungal diseases. If an issue arises, treat it promptly with appropriate fungicides.
- Support for Vines: As your acorn squash plants grow, provide support for the heavy fruit. Using trellises, stakes, or slings can help prevent the vines from breaking under the weight of the developing squash.
- Consistent Monitoring: Regularly inspect your plants for any signs of stress, disease, or pests. Early intervention can often prevent more significant problems later in the season.
By following these care guidelines, you’ll create an environment in which your acorn squash plants can thrive. With dedication and attention to detail, you’ll be rewarded with healthy vines and a bountiful harvest of acorn squash to enjoy in your favorite recipes.
Dealing with Common Pests and Diseases
As you nurture your acorn squash garden, it’s essential to be prepared for potential challenges that may arise in the form of pests and diseases. Vigilance and proactive measures can help you protect your precious plants and ensure a successful harvest. Here’s how to effectively deal with common pests and diseases that can affect acorn squash:
- Aphids: These tiny, sap-sucking insects can quickly infest your acorn squash plants, causing stunted growth and leaf curling. To combat aphids, try blasting them off with a strong stream of water or using insecticidal soap. Ladybugs and lacewings are natural predators that can help keep aphid populations in check.
- Squash Bugs: Squash bugs are notorious pests that can wreak havoc on your plants. They feed on the sap of the leaves and stems, causing wilting and browning. Handpick adult squash bugs and their egg masses from the undersides of the leaves. Neem oil or insecticidal soap can also be effective in controlling these pests.
- Vine Borers: The larvae of vine borers tunnel into the stems of acorn squash plants, causing wilting and plant collapse. Prevention is key for vine borers. Use row covers to protect plants when they are young, and be vigilant for any signs of damage. If you suspect an infestation, carefully remove and destroy affected stems.
- Powdery Mildew: Powdery mildew is a common fungal disease that appears as a white, powdery substance on leaves. To prevent powdery mildew, maintain good air circulation, water at the base of the plants (not overhead), and avoid overcrowding. Fungicidal sprays containing sulfur or neem oil can help if the disease appears.
- Downy Mildew: Downy mildew presents as yellow or brown patches on leaves and is often accompanied by a fuzzy, gray growth on the undersides. To prevent it, provide proper spacing, and adequate ventilation, and avoid overhead watering. Copper-based fungicides can help control downy mildew.
- Bacterial Wilt: Bacterial wilt can cause sudden wilting of leaves and stems. Unfortunately, there’s no cure once plants are infected. The best approach is prevention through good garden hygiene, such as cleaning tools and avoiding planting near infected plants.
- Early Detection: Regularly inspect your acorn squash plants for signs of pests or diseases. Catching issues early allows for more effective and less invasive treatment.
- Organic Remedies: Consider using organic pest control methods whenever possible, as they are less harmful to beneficial insects and the environment.
By being proactive and implementing these strategies, you can effectively manage common pests and diseases that may threaten your acorn squash plants. With proper care and attention, your garden will flourish, and you’ll enjoy a bountiful harvest of these delectable vegetables.
Supporting Your Growing Plants
As your acorn squash plants mature and start producing those delectable fruits, it’s crucial to provide proper support to ensure their well-being and productivity. Acorn squash plants are known for their sprawling growth, and without adequate support, they can suffer damage or become unwieldy. Here’s how to effectively support your growing acorn squash plants:
- Sturdy Trellises or Stakes: One of the best ways to support acorn squash vines is by using sturdy trellises or stakes. Install these supports early in the growing season to avoid damaging the developing roots. Attach the vines to the trellises or stakes using soft ties or twine, being careful not to constrict their growth.
- Slinging Heavy Fruits: As your acorn squash fruits develop and mature, they can become heavy. To prevent them from breaking off the vine prematurely, create slings using old pantyhose, fabric scraps, or netting. Gently secure the slings around the fruit and tie them to the trellis or stake.
- Proper Pruning: Regularly prune your acorn squash plants to remove excess growth or unwanted vines. This not only helps improve air circulation but also directs energy toward fruit production. Be cautious when pruning to avoid damaging healthy parts of the plant.
- Horizontal Growth: Encourage horizontal growth along the trellis or stakes to maximize sunlight exposure and air circulation. This promotes even ripening and helps prevent diseases.
- Proper Spacing: Ensure that your acorn squash plants are adequately spaced. Proper spacing not only allows for better support but also reduces the risk of disease transmission between closely positioned plants.
- Consistent Monitoring: Continuously monitor your plants for any signs of stress or damage. Adjust your support system as needed to accommodate the growing vines and fruits.
- Regular Maintenance: Keep an eye on your trellises or stakes to ensure they remain sturdy and secure throughout the growing season. Reinforce or repair them if necessary to prevent any accidents.
By providing your acorn squash plants with the right support, you’ll help them thrive and produce a bountiful harvest of delicious squash. Healthy, well-supported vines are more resistant to pests and diseases, ensuring a successful gardening experience.
Recognizing When to Harvest
Harvesting acorn squash at the right moment is essential to enjoy its delicious flavor and nutrient-rich goodness. Unlike some vegetables, acorn squash doesn’t continue to ripen after being picked, so it’s crucial to recognize when it’s ready for harvest. Here’s a guide to help you determine the perfect time to pluck your acorn squash:
- Size Matters: Mature acorn squash typically reaches a size of about 5 to 7 inches in diameter. When they reach this size, they are generally ready for harvesting. However, the exact size can vary depending on the specific variety you’re growing.
- Deep Color: Pay close attention to the color of the squash. The rind of a mature acorn squash should be a deep, uniform color. Most varieties turn dark green or orange when ripe. Avoid harvesting squash with green streaks, as they are likely underripe.
- Hard Rind: Gently press your fingernail against the squash’s rind. A mature acorn squash should have a hard, tough rind that’s difficult to puncture. If the rind feels soft or gives under slight pressure, it’s not yet ready for harvest.
- Intact Stem: Examine the stem where it attaches to the squash. A mature acorn squash will have a dry, corky stem that’s firmly attached. If the stem is green or appears fresh, the squash is not yet ripe.
- Thumping Test: While this method is less reliable than the others, you can gently tap the squash with your knuckles. A ripe acorn squash should produce a deep, hollow sound. However, this method is best used in combination with the other indicators.
- Maturity Period: Refer to the recommended maturity period for the specific variety you’re growing. Most acorn squash varieties take between 80 to 100 days to reach maturity from the time of planting. Knowing your variety’s expected maturity can help you time your harvest more accurately.
- Early Harvest: If you prefer a slightly sweeter and more tender squash, you can opt for early harvesting when the squash is smaller and the rind is still edible. These early-harvested acorn squash are delicious in recipes where you can enjoy the skin.
Once you’ve identified that your acorn squash meets these criteria, it’s time to harvest. Use a sharp knife or pruning shears to cut the squash from the vine, leaving a short stem attached. Handle the squash with care to avoid any damage.
By following these guidelines, you’ll ensure that you harvest your acorn squash at its peak of flavor and quality, making it a delightful addition to your culinary endeavors.
Harvesting Acorn Squash
Harvesting acorn squash is a satisfying moment that marks the culmination of your gardening efforts. These delectable vegetables are ready to be plucked when they have reached their peak of ripeness. Here’s a step-by-step guide to ensure you harvest your acorn squash correctly and enjoy the best flavors:
- Visual Indicators: Before you begin harvesting, carefully inspect the acorn squash for visual indicators of ripeness. Look for a dark, uniform color on the rind, with no green streaks. The skin should be hard and resistant to your fingernail when gently pressed.
- Size: Acorn squash typically grows to a size of about 5 to 7 inches in diameter. However, the exact size can vary depending on the variety. Use size as a general guideline but prioritize other indicators of ripeness.
- Stem Condition: Examine the stem where it attaches to the squash. A mature acorn squash will have a dry, corky stem that’s firmly attached. Avoid squash with green or fresh-looking stems, as they are likely underripe.
- Firmness: Gently squeeze the squash. A ripe acorn squash should feel firm and not yield to light pressure. If it feels soft or gives under your touch, it’s not yet ready for harvest.
- Use Pruning Shears or a Knife: To harvest, use clean pruning shears or a sharp knife. Cut the squash from the vine, leaving about an inch of stem attached. This small stem allows the squash to store longer.
- Be Gentle: Handle the squash with care to prevent any damage. Acorn squash have delicate skin, and bruises or cuts can reduce their shelf life.
- Avoid Twisting: Do not twist or pull the squash from the vine, as this can damage both the squash and the plant. Always use a cutting tool for a clean and gentle harvest.
- Collect in a Basket: Place your harvested squash in a sturdy basket or crate. Avoid stacking them too high to prevent bruising or damaging the squash.
- Store Properly: After harvesting, store your acorn squash in a cool, dry place with good ventilation. They can last for several weeks when stored correctly.
Harvesting acorn squash at the right time ensures that you enjoy their full flavor and nutritional benefits. Whether you plan to cook them immediately or store them for later use, the satisfaction of harvesting these homegrown gems is a reward.
Storing Your Harvest
The secrets to preserving the bounty of autumn with our comprehensive guide on storing your freshly harvested acorn squash. Acorn squash, with its rich, nutty flavor and versatility, is a beloved seasonal favorite. To ensure that you can enjoy its deliciousness well beyond the fall months, it’s crucial to master the art of proper storage..
Cooking Tips for Acorn Squash
After the joy of harvesting your acorn squash, it’s important to know how to store them properly to maintain their freshness and quality for weeks or even months. Proper storage ensures that you can enjoy the delicious flavors of your homegrown acorn squash well into the future. Here’s a guide to storing your harvest:
- Choose the Best Squash: Select the best-quality acorn squash for storage. Look for specimens that have reached full ripeness, with firm, unblemished skins and intact stems. Avoid any squash with signs of damage or soft spots.
- Cure the Squash: Before storing, it’s beneficial to cure your acorn squash for about ten days. Place them in a warm, dry area with good air circulation, such as a sunny windowsill or a porch. This process helps harden the skin, making it less susceptible to decay during storage.
- Check for Damage: Examine all your squash carefully one last time before storing it. Even a small bruise or cut can lead to spoilage, so it’s essential to identify and separate any damaged squash from the healthy ones.
- Optimal Storage Conditions: Acorn squash is stored best in a cool, dry place with a consistent temperature. Ideally, keep them in a cellar, basement, or pantry where temperatures range from 50 to 55°F (10 to 13°C). Ensure good ventilation to prevent moisture buildup.
- Keep Them Elevated: Store your acorn squash on shelves, crates, or racks, rather than directly on the ground or in contact with each other. This minimizes the risk of moisture-related issues and allows air to circulate around them.
- Avoid Refrigeration: It’s important to note that acorn squash should not be stored in the refrigerator. Cold temperatures can negatively impact their texture and flavor, causing them to lose their sweetness.
- Regularly Inspect: Periodically check your stored squash for any signs of decay, soft spots, or mold. Remove any compromised squash immediately to prevent spoilage from spreading to the others.
- Use Within Several Months: Acorn squash can typically be stored for several months under the right conditions. However, they are best when consumed within the first few months of storage to ensure optimal flavor and quality.
- Preserve with Cooking: If you find that some of your squash is beginning to show signs of deterioration, consider cooking and preserving them. You can puree or freeze cooked squash for later use in soups, stews, or baked goods.
By following these storage guidelines, you’ll be able to savor the rich, nutty flavor of your homegrown acorn squash long after the harvest season has passed. Properly stored acorn squash can be a delightful addition to your winter meals, providing a taste of your garden’s bounty even in the colder months.
Health Benefits of Acorn Squash
Description: Dive into the world of nutritional wonders as we explore the remarkable health benefits of acorn squash. This informative guide unveils the numerous ways this delicious and versatile vegetable can boost your well-being.
Acorn squash is a powerhouse of nutrients, offering a rich source of vitamins, minerals, and antioxidants. Learn how it can support your immune system with its high vitamin C content, enhancing your body’s defenses against illnesses.
Discover the impressive fiber content of acorn squash and how it aids in digestive health, promoting regularity and a healthy gut. Its fiber also assists in managing weight and maintaining stable blood sugar levels, making it an excellent choice for those seeking a balanced diet.
Explore the wealth of antioxidants in acorn squash, such as beta-carotene and vitamin E, which help combat oxidative stress and reduce the risk of chronic diseases. Learn how these antioxidants can contribute to maintaining youthful skin and promoting overall vitality.
Conclusion
Growing acorn squash can be a rewarding experience for both novice and experienced gardeners. By following these guidelines, you’ll be well on your way to cultivating a bountiful harvest of this delicious and nutritious vegetable. So, roll up your sleeves, get your gardening tools ready, and enjoy the process of nurturing your acorn squash plants from seed to table.
Frequently Asked Questions (FAQs)
- How long does it take for acorn squash to grow from seed to harvest?
Acorn squash typically takes 80 to 100 days from planting to harvest, depending on the variety and growing conditions. - Can I grow acorn squash in containers or pots?
Yes, you can grow acorn squash in large containers or pots, provided they have enough space to vine and receive adequate sunlight. - What are the common pests that affect acorn squash?
Common pests include aphids, squash bugs, and vine borers. Regular monitoring and pest control measures can help protect your plants. - Is it necessary to hand-pollinate acorn squash flowers?
While acorn squash flowers are primarily pollinated by bees, you can hand-pollinate them using a small brush or cotton swab to ensure fruit set. - Can I eat acorn squash skin?
Yes, the skin of acorn squash is edible when cooked. It becomes tender and adds texture to your dishes.